1) Draw the AB Line
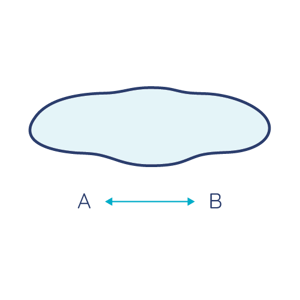
To get scale and measurements correct, you need to establish two points for your AB line. An AB line is a straight line you mark on your deck about 4-5 feet out from the edge of your pool. The line will run between point A and point B.
Your AB line should be about two-thirds the length of the pool. So for example, if your pool is 40' long, the distance between point A and point B should be roughly 26'.
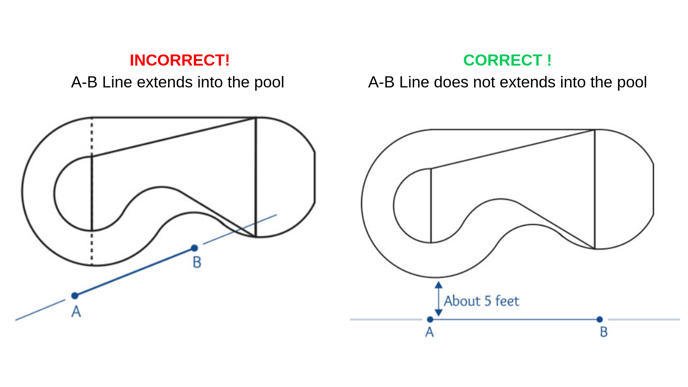
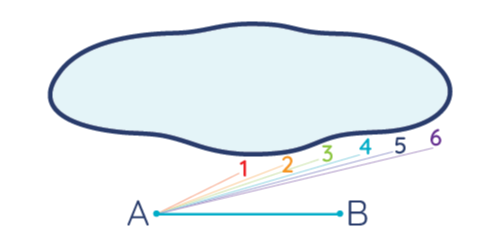
When facing your pool, point A must always be on the left of point B.
Point A and point B should be on a flat surface and the line, if it were to extend out, should not cross the pool at any point. See the example below.
Once you have the ideal AB line location, mark the line on your deck. We recommend a chalk line as this is more accurate than a hand-drawn line.
A chalk line is a tool that spools out chalk-covered string. The string is used to draw a straight line from point to point by using the tight line of string. Snap the string against your deck to create the line.
Measure and notate the distance between point A and point B.
2) Mark AB Points
Halfway between the A and B points, walk to the edge of your pool. This will be point location 1. Mark it as "1" with chalk on the inside edge of the pool.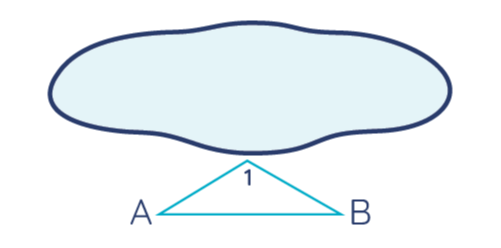
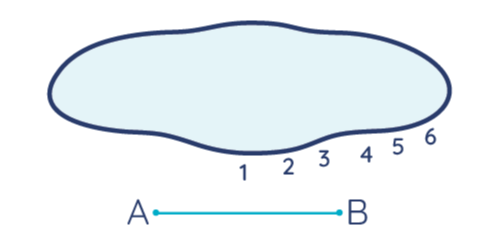
From there, move clockwise, and mark a "2" approximately 2-3 feet away from point "1".The distance between points can vary and do not have to be exact. If you are marking points within a sharp curve or corner, your points will want to be closer to 1-2 feet. If you are marking points along a straight section you can make them further apart. Always make any corners or obvious bends a point.
Continue clockwise, marking the next number every 3 feet out. You want to use numbers instead of tick marks. You will need to reference numbers later down the line and will not want to have to count 70+ something tick marks to know which point you're referencing. Trust us, use numbers.
Point locations around any obstructions or features, such as ladders, slides, waterfalls, spas, step sections, etc, should be numbered as well. Do this after you have finished the perimeter. When you add a number for a special feature location, start with the next number you left off from on your perimeter. For example, if your last perimeter number was 85, you would label your first mark on a feature 86 and continue up from there.
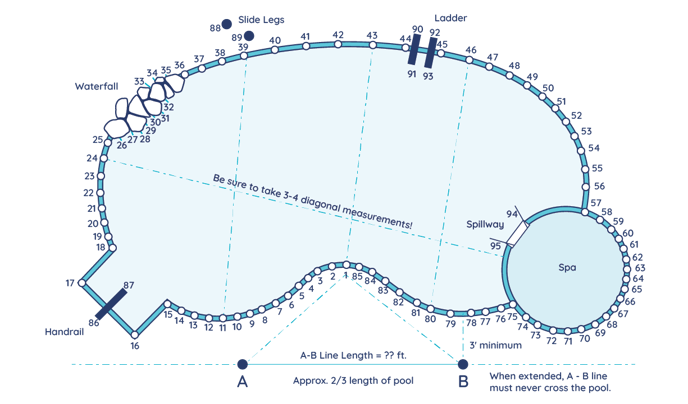
3) Measuring the Distance From A, and the Distance from B
Now measure the distance from Point A to each of your numbered marks.
If you are using a 100 ft. measuring tape, secure the end to point A on your AB line and measure the distance to point #1. Note the distance in the "A" column on the chart provided within the form. Continue around the pool until you have recorded all your points with an "A" measurement.
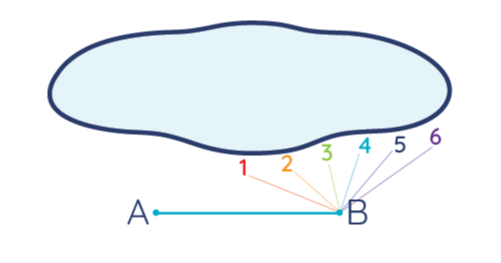
Then secure your measuring tape to point B and repeat the process.
Go back and spot check a couple of measurements again to make sure they are as accurate as possible.
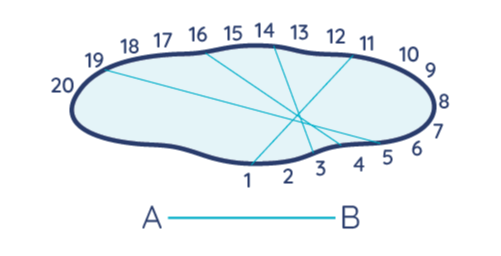
4) Reference Distances
Finally, take 3-4 diagonal measurements randomly from numbered points across the pool. This allows the cover manufacturer to have cross dimensions to reference. Note the numbers used and the distance between in the spaces provided on the form.
Draw Your Pool with AB Scale Notation
Once you have all your measurements, make your art teacher proud by creating a sketch of the pool, as close to scale as you can. A scale drawing means that the dimensions are the same but the size is smaller. For example, one-centimeter on your drawing might equal one-foot for the pool. Use graph paper for the best results. There is graph space provided on the safety cover measurement form for this. 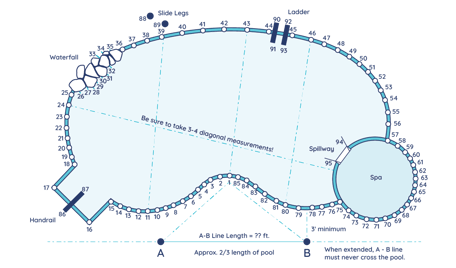
The AB line has to be in the same location on your drawing as it is physically with respect to your pool. Make your drawing match as much as you can.
If using the graph area provided, use the AB line already on the graph to showcase your pool's location and work off of. Draw your pool's shape, the numbered marks, and the special features/obstructions into a scale-image drawing of your pool. This will give us enough reference measurements to create the correct cutout for your pool cover.
Take Photos of the Pool and Features
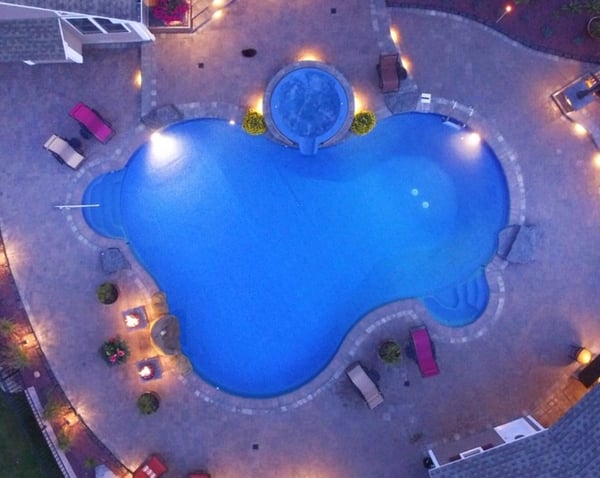
It is very helpful to also have corresponding photos of your pool. This will help us know what kind of features the cover is being fitted around and how to translate your drawings into a real-world cover. Snap multiple photos of your pool from various angles with the AB charting chalk still in place. If you have a balcony, second story, or even a drone (finally an excuse to use it), an overhead photo of the pool is also very useful.
Fill Out the Form and We'll Do the Rest
Finally, collect all your measurements, notes, and drawings and fill out the custom pool cover measurement form entirely. Then send the form to support@royalswimmingpools.com along with your attached photos. We'll take it from there!
Didn't find the answer you were looking for? You can always contact us at support@royalswimmingpools.com or choose the category below to see our most frequently asked questions for that topic: