TOOLS
- Shot stick (or level measuring stick)
- Transit/Water level
- Excavation Digging Tools/Machinery
- Rebar Stakes
- Hammer
- Spray Paint
- String
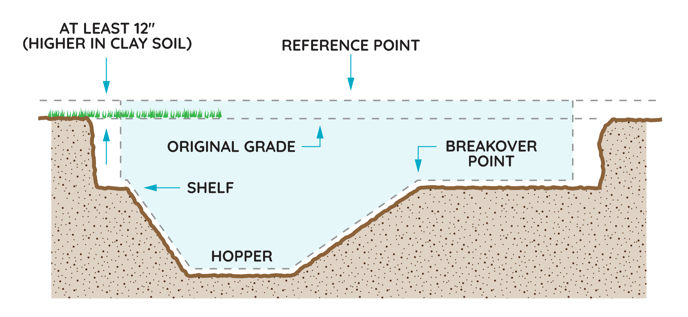
Once the layout is complete, choose the elevation for the top surface of the pool. If you are using bullnose coping, make sure to note that the top of the coping will also be the top of your finished deck. Normally the surface will correlate with a surrounding walkway, patio deck, or the highest ground elevation of the pool site. The top surface of the pool must be at least two to four inches (2" to 4") above the highest ground elevation to prevent rain and debris from draining/overflowing into the pool.
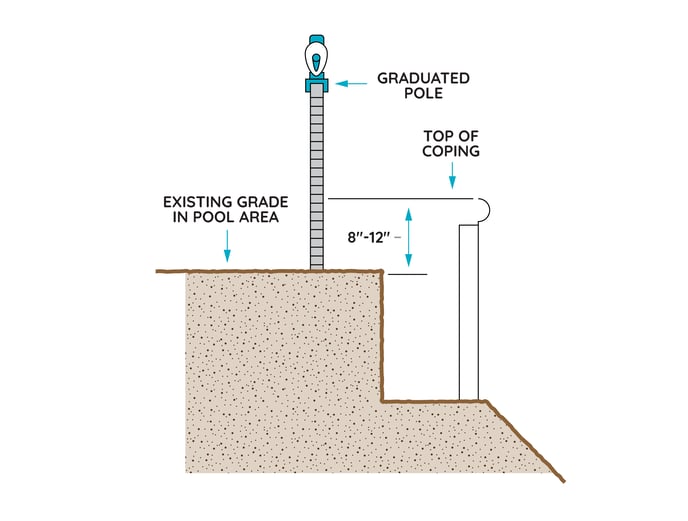
In order to determine the depth of the excavation, you’ll need to use the standard calibrated survey shot stick (level measuring stick) and transit or water level. A 2 x 2, telescopic pool pole approximately 10' long, or other similar stick can be substituted for a standard shot stick.
IMPORTANT!
The height of a standard pool wall is 42” plus the height of your selected coping, which must be added to the wall height to get the accurate total wall height.
In an out-of-the-way place that will not have to be moved during construction, set and level the transit or water level and then locate the highest ground elevation of the area around the pool site. This is done by placing a shot stick at selected areas and marking it at the level indicated by the transit. With a pencil, mark the stick at the point where the transit cross-hairs intersect with the shot stick. When using a water level, mark the shot stick with duct tape at the level of water in the tube. Add two to four inches (2" - 4") to this elevation mark.
This will now be your reference point for the elevation of the top surface of the finished pool coping and deck (or the top surface of brick coping). The finished elevation indicated on your dig spec is measured to the top of the pool wall (usually 42" not including the height of the bullnose coping). The dig measurement indicated on your dig spec is usually 42" for the shallow end of the pool and 2" deeper than the finished depth of the deep end of the pool. This does not include the additional height of excavation needed for your selected coping.
Next, measure 44½" above the level mark on the shot stick and mark with tape or marker. This new mark now determines the excavation depth for the shallow end and over dig ledge. Transpose/transfer this elevation mark to a deck, sidewalk, mortar joint on a block/brick wall, or drive a stake in an out of the way place and mark for future reference. The depth of the pool wall footing excavation will be 44½" below this reference point.
A retaining wall may be needed if excessive sloping of the landscape around the pool area prevents the desired finished elevation needed to meet an existing patio elevation.
Next, the entire shallow end of the pool is to be dug to the same level as the shelf. This is the 44½" depth, measured from the top of the coping. The first operation is to dig the pool area (including the 2' wide working shelf/over dig) to a uniform depth of 44½" below the reference point selected as the top surface of the pool. Dig the working shelf/over dig across the width of the pool. Place the shot stick in the hole as the excavator continues to dig until the depth is equal to the 44½" mark. When the 44½" mark is in the level sight of the transit you know that this part of the hole is at the proper depth.
IMPORTANT!
Always check and re-check the excavation depth from the reference point during the excavation.
In pools with steps, lounges, or similar accessories, the length and width of the over dig must be extended to accommodate each unit and its braces.
TIP
If the pencil mark is above the crosshairs, the excavation is not deep enough, and the pool will be higher than the predetermined elevation. If the mark below the crosshairs, the excavation is too deep and the pool wall will be below the predetermined elevation. If you are using the water level, the water will be below the mark in the tube when the excavation is too high and above the mark when the excavation is too deep.
Accuracy at this stage is imperative and will require fewer adjustments to the pool walls later.
Repeat the previous steps on marking the Pool Layout in order to recreate the layout inside the excavation area. Remember to leave the 2' over dig as working space and brace the ledge. This layout needs to be accurate as it will decide the exact position of the pool. Use rebar stakes and paint or flour to mark the outline of the pool.
Usually, the last stage of excavation involves digging the hopper (the deepest part of your pool). Hoppers vary in width, length, and depth and should be dug according to the dimensions on the dig specification drawing. Generally, installers drive stakes at the hopper corners, transition points, and pool wall corners and connect string to them at this time. The string is set at the height of the intended finished grade. Remember, if the pool is to be used for diving, the finished dimensions must conform to applicable codes and standards.
IMPORTANT
Be careful not to dig into the area outside of the string to avoid an undercut of the 2' ledge. Doing so will remove the supporting ledge for the pool wall panels.
While digging the hopper, the excavator can trim the hopper walls to the proper slope as the final depth of the hole is reached. The excavated depth of the hopper is 4½" deeper than the finish dimensions of the pool. This allows for 2" of sand/vermiculite pool base on the bottom and the 2½" coping (actual coping height can vary. You should measure the actual height of the coping supplied with your kit).
Refer to the swimming pool dig spec drawing for your specific pool size for the total excavated depth of the deep-end. Your dig specs (also called panel layout) were sent and approved during your ordering process and should have also been emailed to you along with this guide. The dig spec shows the depth measured from the top of the pool wall. If you are using bullnose coping, you’ll need to add an additional 2½" of excavated depth from the top of the coping or finished elevation. The finished measurement shown on the dig spec is the measurement from the pool floor to the liner track or top of the pool wall.
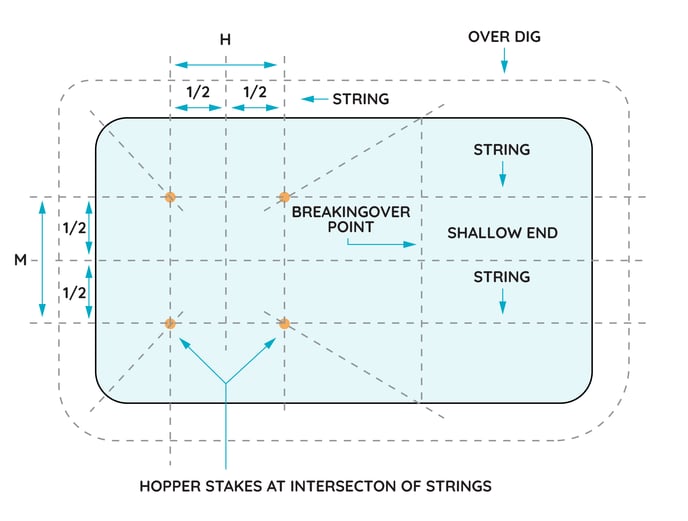
Check the hopper/deep end of your pool to make sure it is squared as you proceed from the hopper toward the shallow end. To square the hopper, measure the diagonals/slopes. If the diagonals are equal, the layout is square.
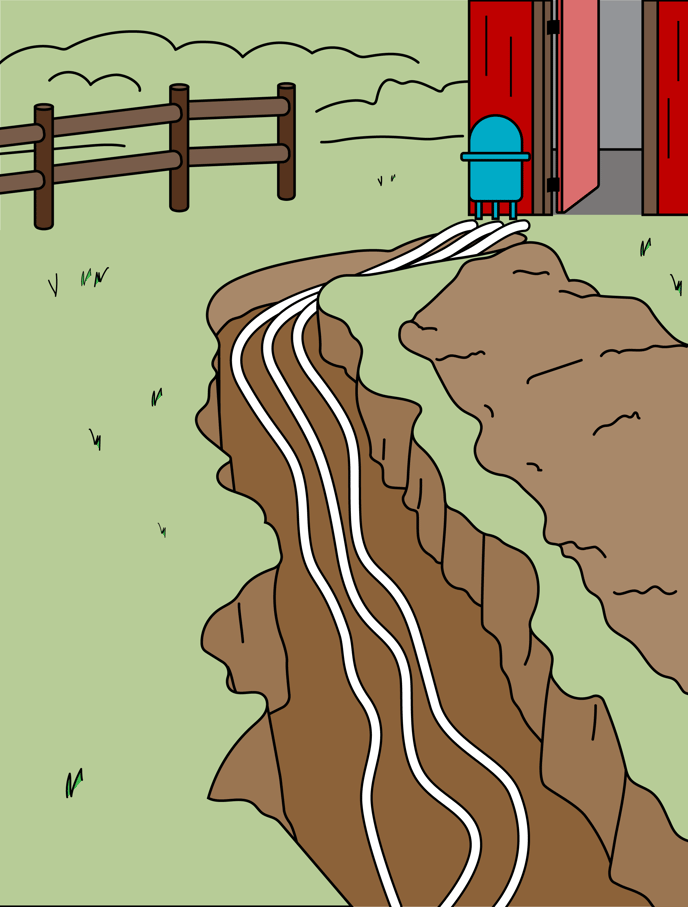
A trench for plumbing tubes from the pool to the planned filter location can be dug at this time. The excavator should dig the plumbing trench at a depth of at least eighteen inches (18"). It should reach from the pool over dig to the equipment pad. This will save digging by hand later!
Continue to the next installation step: How to Set the Panels for your Inground Pool
Didn't find the answer you were looking for? You can always contact us at support@royalswimmingpools.com or choose the category below to see our most frequently asked questions for that topic: