
Before you begin
This is Step 16 of 17 in our round above ground pool installation guide. If you have not finished Step 15, secure your vertical supports first. Use a carpenter's level to check that each upright is standing perfectly straight, because if the uprights are not level the top ledge rails will be very difficult to fit together.
Use your parts list and a felt tip pen to locate and mark the correct holes on each top plate before you install them on the pool.
Your pool also came with the manufacturer's installation manual. Always follow the manufacturer's instructions so you do not void your warranty, and review our above ground pool safety information before you start.
Fitting the rails
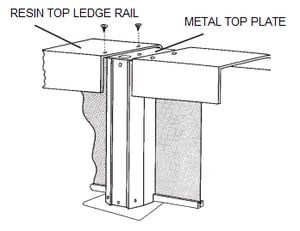
Top ledge rails can either be metal or resin.
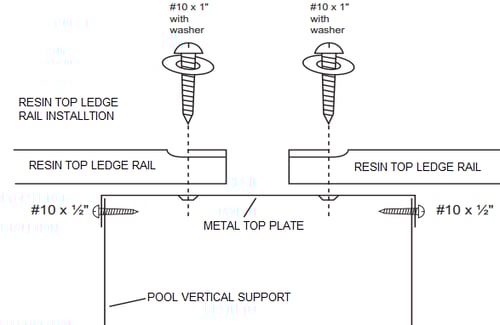
Resin Top Ledge Rails require special screws that have attached washers in order to attach the resin top rail to the metal top plate.
When installing the top ledge rails do not tighten screws until all top ledge rails have been installed. This will allow room for any necessary adjustments on the final few rails.

PRO TIP: If the pool is slightly out of round, you may have a problem getting the last rail to go on. If you're struggling, check that the roundness of the pool hasn't shifted and that your uprights are still standing straight.
When to tighten the screws
Once every top ledge rail is in place, tighten all of the screws. This happens at Step 17, at the same time you attach the top cover connectors.
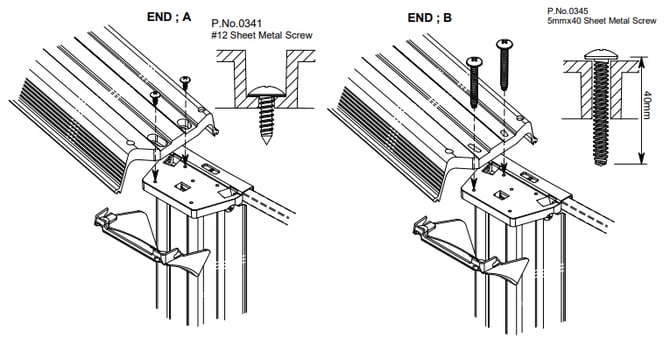
*Depending on your pool model, you may require different types of screws. This should be made known in your specific pool's installation guide and parts list. Images may vary but the installation concept should remain the same. Additional examples below:
Continue to the next step: How to Install the Top Cover Connectors on your Above Ground Pool
Previous step: How to Secure the Vertical Supports on your Above Ground Pool
Or view the full guide on the 17 steps to installing your round above ground pool.
Still need help?
Didn't find the answer you were looking for? You can always contact us at support@royalswimmingpools.com or choose the category below to see our most frequently asked questions for that topic: