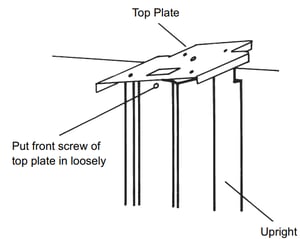
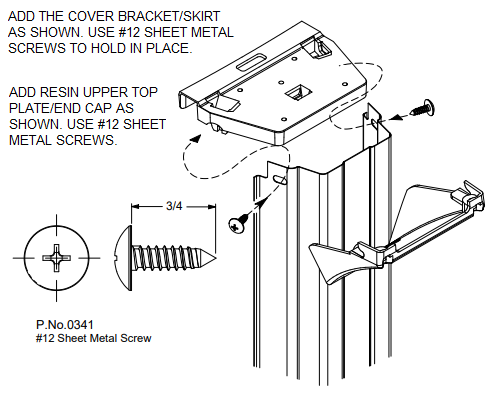
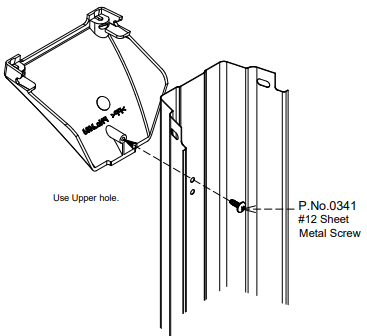
Start the pre-assembly of the uprights.
 PRO TIP: It is easiest to line all uprights next to each other in a line. It helps to lean them against a fence or some other sturdy object.
On most models, the top of the uprights can be identified by either having an extra hole in the middle or by an extra hole on each side (depending on which pool you have) for the decorator caps.
- Place the metal top plate on the upright making sure the holes line up and the hooked part of the plate is facing the open end of the upright (the side that goes against the pool wall).
- Now put a #10 x ½” screw in the center hole only. Do not install screws in the two side holes until later. This will make things easier and more efficient later down the line. *This is one possible example of what a top plate looks like. Depending on your make and model, your top plate may look slightly different. Below is another option for what this could look like for your pool. Continue to step 3 below.


| NOTE: |
| If you have purchased a fence to go around your pool now would be the time to install the fence post holders onto the uprights. See appendix C. |
3. Once your uprights are all pre-assembled, you should line the uprights around the pool at every Bottom Plate for easier assembly later on.
 WARNING! DO NOT ATTEMPT THE NEXT STEP IN WINDY CONDITIONS! THE WALL IS VERY HEAVY AND EXTREMELY DIFFICULT TO MANAGE ON A WINDY DAY. IF THE WIND DOES CATCH THE WALL DURING INSTALLATION, IT CAN CREATE DANGEROUS SITUATIONS AND/OR CAUSE DAMAGE.
Continue to the next step: How to Install your Above Ground Pool Wall
Or view our guide on the 17 steps to installing your Round Above Ground Pool here.
Didn't find the answer you were looking for? You can always contact us at support@royalswimmingpools.com or choose the category below to see our most frequently asked questions for that topic:
